Step-by-Step Guide to Building Recurring Donation Forms in WordPress
Many organizations seek to establish consistent funding streams through automated contributions. Implementing a recurring donation form on your WordPress site provides an effective solution for achieving this goal.
By enabling recurring donations, you offer supporters a convenient method to contribute regularly to your cause. This approach helps organizations secure predictable funding, which facilitates better financial planning and supports long-term initiatives.
This guide will walk you through several methods for creating recurring donation forms within WordPress.
Benefits of Implementing Recurring Donation Forms
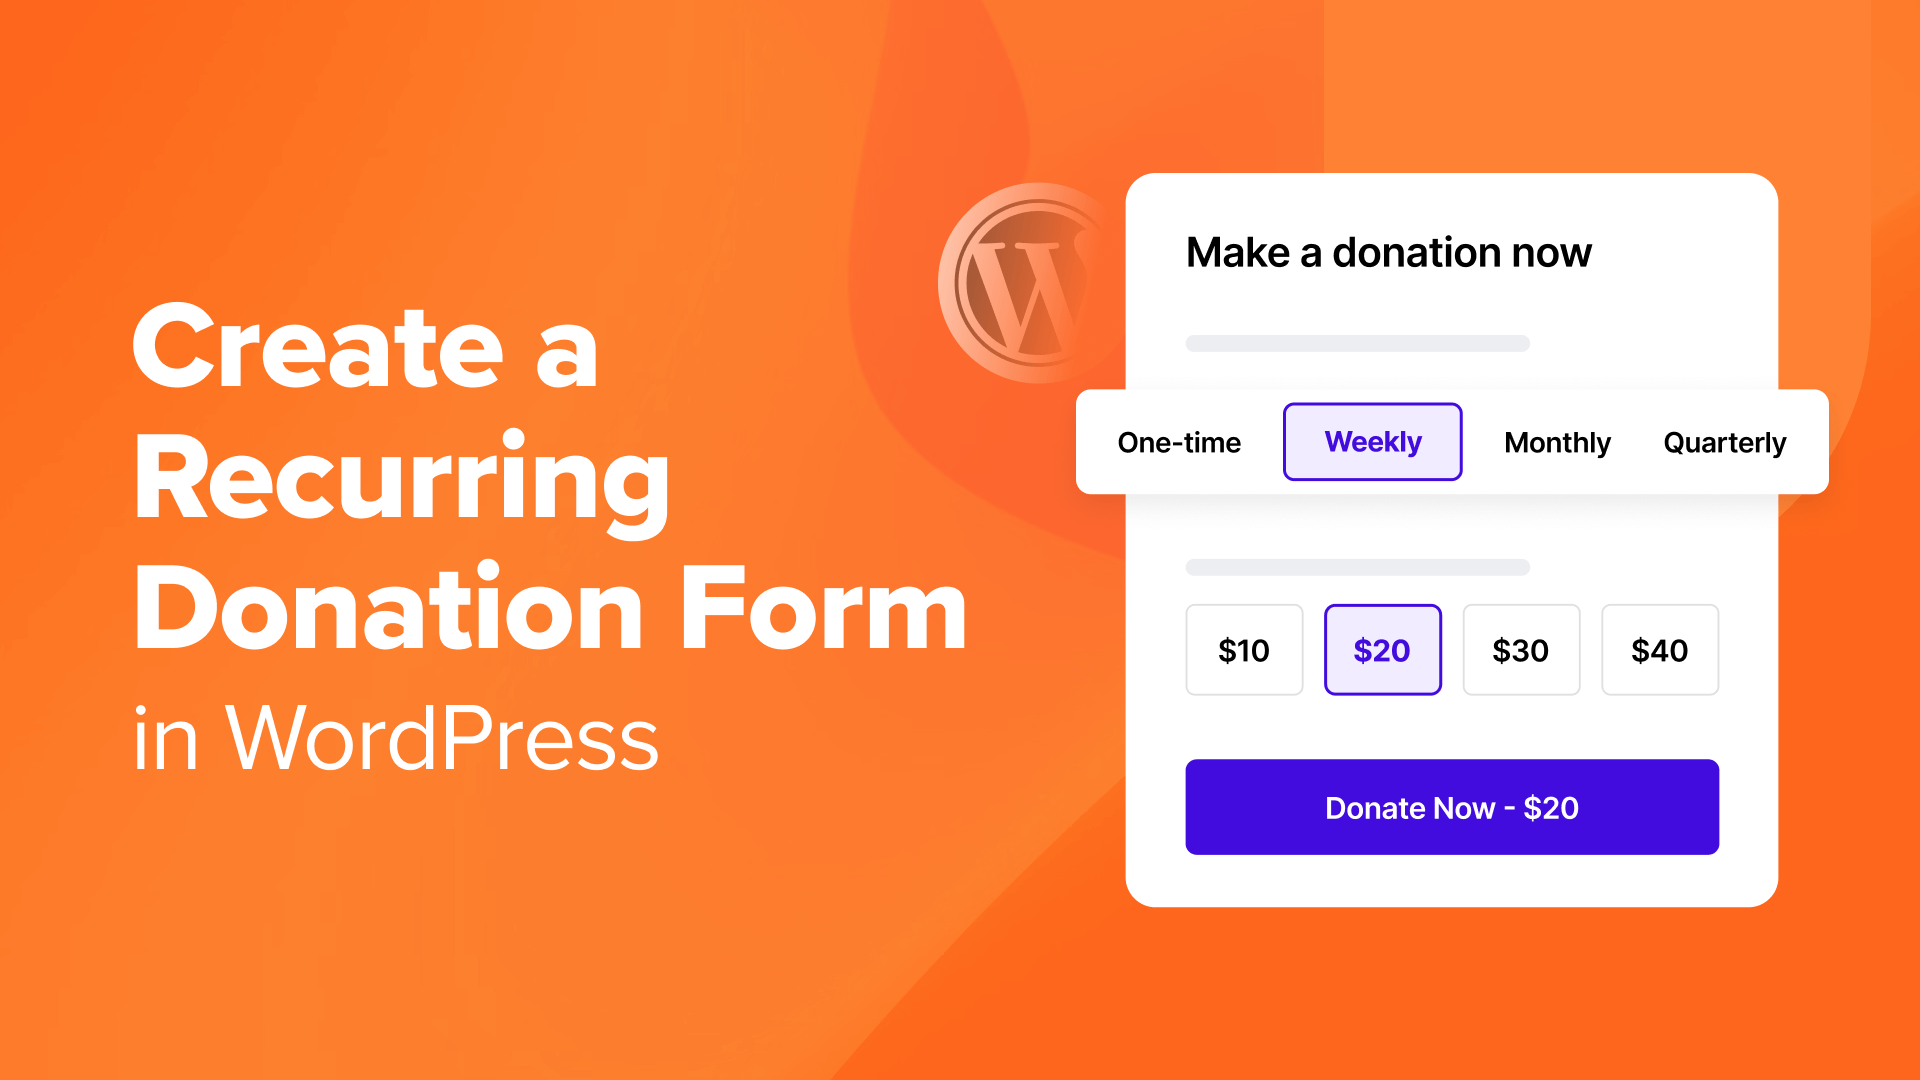
Recurring donations represent regular contributions made by supporters to sustain organizations or causes they care about.
Rather than making single contributions, donors can establish automated payments at predetermined intervals, including weekly, monthly, quarterly, or annual schedules.
For nonprofit organizations, donor support forms the foundation of operations. While one-time gifts provide valuable assistance, they may not deliver the predictable revenue needed for comprehensive planning.
Recurring payments establish reliable income streams that enable better budgeting and resource allocation. This predictability helps organizations plan marketing initiatives and allocate funds effectively to support their missions.
Automated contributions also simplify the donation process for supporters. Donors can establish automatic payments without manually initiating each transaction. Many contributors appreciate this convenience, as it ensures consistent support even when they might otherwise forget to donate.
Some organizations enhance engagement by incorporating gamification elements. For instance, using membership plugins allows you to create tiered reward systems where increased contributions unlock additional benefits. Recognition programs, leaderboards, and special event invitations can further motivate ongoing support.
The following sections detail three distinct approaches to creating recurring donation forms in WordPress.
- Creating a Recurring Donation Form with Charitable
- Creating a Recurring Donation Form with WP Simple Pay
- Creating a Recurring Donation Form with WPForms
Creating a Recurring Donation Form with Charitable
Charitable represents a popular solution for organizations seeking to implement recurring donation functionality.
This plugin provides comprehensive fundraising tools specifically designed for nonprofit websites.
Beyond basic donation form creation, the platform offers various extensions. These include email marketing integrations that help maintain communication with supporters through their preferred email service providers.
The plugin also supports peer-to-peer fundraising campaigns, which can be particularly useful for organizations managing multiple projects or initiatives. This functionality allows donors to select specific causes they wish to support.
To begin, install and activate the Charitable plugin on your WordPress site.
After activation, navigate to the Charitable » Addons section. Locate the 'Charitable Recurring Donations Addon' and click 'Install Addon,' then 'Activate.'

Next, access the Charitable » Settings page.
Under the Payment Gateways tab, select 'Enable Gateway' next to the Stripe option.

Click the 'Connect with Stripe' button to proceed.

A setup wizard will guide you through the connection process. Enter the email address associated with your Stripe account during this process.
If you don't have a Stripe account, you'll need to create one to begin processing donations.

After successfully connecting your Stripe account, you'll return to the settings page.
The Connection Status should indicate that Stripe is 'Connected In live mode.' Click 'Save Changes' to store your configuration.

Now proceed to create your donation form by navigating to Charitable » Add New.
A pop-up window will appear requesting a campaign name. Enter an appropriate name and select 'Create Campaign.'

You'll then see available templates that provide starting points for your campaign. The platform also offers blank layouts with one or two columns if the templates don't suit your specific requirements.
For demonstration purposes, we'll select the 'Club / Organization' template. Hover over your chosen template and click 'Create Campaign.'

You can now customize your form's appearance and functionality. Add form fields, modify text, insert buttons, images, or videos, and adjust the layout as needed.
The drag-and-drop interface allows you to position elements by dragging them from the left panel to the editor on the right.

To edit existing fields, click on the element within the editor.
Adjustments to text, colors, alignment, and other properties appear in the 'Layout Options' tab.

Navigate to Settings » Donation Options to configure donation parameters.
Scroll to 'Recurring Donations' and enable 'Allow Recurring Donations.' Consider also enabling 'Allow Recurring Custom Donations' to let supporters choose their preferred contribution amounts.
You may want to select 'Recurring Donation Amounts' under the Default Tab to encourage regular contributions. Alternatively, you can allow donors to determine their own donation frequency for maximum flexibility.


