Implementing Weight-Based Shipping Calculations in WooCommerce
Shipping costs that appear unexpectedly during checkout represent a significant factor in shopping cart abandonment. When WooCommerce store owners implement shipping rates that customers perceive as excessive or unclear, they risk losing potential sales without immediate awareness.
Establishing transparent and equitable shipping pricing is therefore essential for e-commerce success. One effective approach to achieving this clarity involves implementing weight-based shipping calculations.
This methodology calculates shipping fees according to the total weight of items in the shopping cart. Orders containing lighter products receive correspondingly lower shipping rates, while heavier shipments incur appropriately higher charges. This system helps merchants accurately cover shipping expenses while maintaining customer satisfaction.
After evaluating both WooCommerce's native functionality and various third-party solutions, we have identified the most reliable approaches for configuring this shipping method.
This comprehensive guide provides detailed instructions for implementing weight-based shipping in your online store. Additionally, we will share practical recommendations to help you avoid common configuration errors and maintain a streamlined checkout experience.
Benefits of Weight-Based Shipping for WooCommerce Stores
Weight-based shipping establishes fair and precise delivery charges by calculating rates according to the actual weight of customer orders.
Unlike flat-rate shipping systems that apply identical fees to all purchases regardless of weight, this approach prevents overcharging customers for lightweight items while ensuring adequate compensation for shipping heavier products.
Implementing weight-based shipping in your WooCommerce store provides enhanced control and flexibility over shipping operations. This method eliminates estimation inaccuracies, prevents unexpected charges at checkout, and maintains pricing transparency throughout the purchasing process.
This shipping strategy proves particularly valuable for stores selling heavy merchandise, product bundles, or diverse inventories containing both lightweight and bulky items.
Whether your store specializes in furniture, books, exercise equipment, or other products, weight-based shipping helps maintain profitability while ensuring shipping costs remain transparent for your customers.
With these advantages established, let's examine practical methods for implementing weight-based shipping in WooCommerce. This tutorial covers two distinct approaches, with navigation links provided for your convenience:
- Method 1: Configure Weight-Based Shipping Using Default Settings
- Method 2: Implement Weight-Based Shipping Using a Plugin
- Bonus: Configure Shipping Discounts in WooCommerce
- Frequently Asked Questions About Weight-Based Shipping
Method 1: Configure Weight-Based Shipping Using Default Settings
This approach demonstrates how to establish weight-based shipping calculations without installing additional WooCommerce extensions or plugins.
While WooCommerce does not include a dedicated weight-based shipping feature within its core functionality, a practical workaround exists using existing tools.
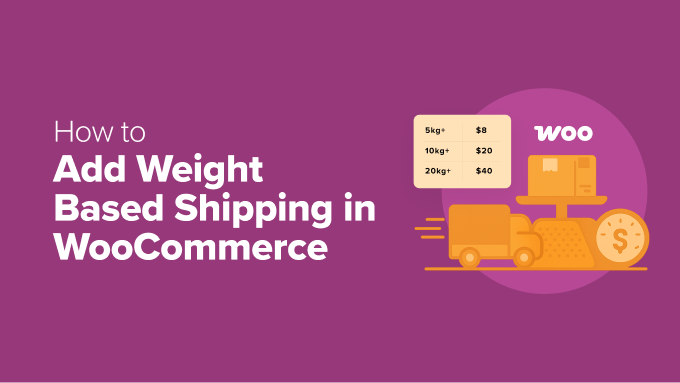
Rather than implementing direct weight-based calculations, you can utilize shipping classes to categorize products according to weight ranges. Within each shipping zone, you can then establish different flat rates corresponding to each weight classification.
This configuration allows heavier items to incur higher shipping costs while lighter products ship for reduced rates, all accomplished using WooCommerce's standard settings.
To begin this process, navigate to the Shipping Classes section by accessing WooCommerce Settings, then selecting Shipping, and finally Classes from your WordPress administration dashboard. Click the 'Add shipping class' button to proceed.

In the dialog window that appears, enter a descriptive name for your shipping class. Selecting a clear, recognizable name that indicates the product weight category is recommended.
For instance, if creating a classification for products weighing less than 5 kilograms, you might name this class 'Under 5kg' or similar descriptive terminology.

Next, you may optionally add a URL slug for the shipping class. This field can remain blank, allowing WooCommerce to automatically generate a slug based on the class name. Alternatively, you can enter a custom slug for greater control over URL structure.
Following this, include a brief description explaining the purpose of this shipping class. This information primarily serves as reference material for store administrators and team members.
Complete this step by clicking the 'Create' button to establish your first weight-based shipping class.
Repeat this procedure to create additional shipping classes corresponding to different weight ranges as needed for your product inventory.
When finished, your shipping classes interface should display all configured weight categories similar to this example:

Proceed to the Shipping Zones section, where you will find all configured shipping zones for your store. These zones represent geographical regions or countries where you provide shipping services.
If you have not previously established shipping zones, click the 'Add zone' button to create your first zone.

This action opens a new configuration screen where you can assign a name to your shipping zone. Many experienced developers recommend naming zones according to the geographical regions or countries they serve, as this practice minimizes potential confusion.
After naming your zone, enter the target region or country name in the 'Zone regions' field. When the appropriate option appears in the dropdown, select it to add that location to your zone. You may include multiple regions within a single shipping zone as needed.
Once your zone regions are configured, click the 'Add shipping method' button to continue.

A configuration dialog will appear on your screen.
From the available options, select 'Flat rate' and click 'Continue' to proceed.

In the subsequent configuration step, assign a descriptive name to your shipping method. This name appears to customers during checkout, so clarity is essential. A name such as 'Shipping Cost Based on Product Weight' effectively communicates the pricing methodology to customers.
Next, specify a default shipping cost in the 'Cost' field. This amount represents the base shipping charge for products without assigned shipping classes. This default cost may combine with additional shipping fees, which will be explained in subsequent steps.

Scroll downward to locate the 'Shipping class costs' configuration section. Here you can establish specific shipping costs for each weight-based shipping class you previously created.
For example, you might configure a $10 shipping charge for products in the 11-15 kilogram class and a $20 charge for items in the 16-20 kilogram category.
Important Consideration: WooCommerce calculates total shipping costs by adding shipping class costs to the default flat rate. For instance, if your default cost is $5 and a product's shipping class cost is $10, the customer's total shipping fee becomes $15.

To utilize only shipping class costs without the default charge, you must set the primary 'Cost' field for the flat rate to $0.
Directly beneath the cost configuration fields, you will find additional settings for calculating shipping costs based on product classifications.